Has your trusty hydraulic floor jack started acting sluggish, struggling to lift a vehicle, or even making strange noises? Chances are, air has become trapped within its hydraulic system. This common issue can significantly reduce your jack’s performance and even pose safety risks. Fortunately, bleeding the air from your floor jack is a straightforward DIY task that can restore its full lifting power and smooth operation. This comprehensive guide will walk you through the process, ensuring you can tackle this maintenance job quickly and effectively.
Understanding Your Floor Jack: What is it and Why Bleed It?
A hydraulic floor jack is an indispensable tool for any garage, relying on an incompressible fluid (hydraulic oil) to generate immense lifting force. Its basic mechanism involves a pump pushing fluid from a reservoir into a cylinder, extending a ram to lift heavy objects like cars or trucks. However, this closed system can sometimes introduce air. Air can become trapped during transportation, if the jack is stored on its side, or even when refilling the hydraulic oil.
The presence of air bubbles in the hydraulic fluid is problematic because, unlike fluid, air is compressible. When you pump the handle, instead of directly transferring force to lift the load, some of that effort is wasted compressing the trapped air. This leads to a “spongy” feel in the pump, reduced lifting capacity, slow or uneven lifting, or in severe cases, the jack failing to lift at all. Ignoring these symptoms can lead to frustration and potentially unsafe operating conditions.
Signs Your Floor Jack Needs Bleeding
Identifying when your floor jack needs bleeding is crucial for maintaining its efficiency and safety. Several warning signs indicate that air might be present in the hydraulic system:
- Excessive Pumping: You find yourself needing to pump the handle many more times than usual to achieve the desired lift height.
- Slow or No Lift: The jack struggles to lift the vehicle, lifts very slowly, or simply doesn’t move the load despite repeated pumping.
- Jack Sinks Slowly Under Load: Even with the release valve fully closed, the jack gradually lowers the vehicle, indicating a loss of internal pressure.
- Spongy or Erratic Operation: The lifting action feels inconsistent, jerky, or “soft” as you pump the handle.
- Abnormal Noises or Foaming Oil: You might hear banging or knocking sounds during operation, or observe tiny air bubbles or foam in the hydraulic fluid reservoir (if visible), which signifies aeration.
Recognizing these symptoms early allows for prompt intervention, preventing further performance degradation and potential damage to the jack.
Essential Tools for Bleeding Your Floor Jack
Before you begin the bleeding process, gather a few basic tools to ensure a smooth and efficient procedure:
- Hydraulic Jack Oil: Always use the specific type of hydraulic jack oil recommended by your jack’s manufacturer. Using other fluids like motor oil or transmission fluid can damage the seals and internal components.
- Flat-Head Screwdriver: This is typically needed to loosen the filler plug or release valve.
- Clean Rags: Essential for wiping up any spilled hydraulic oil, as it can be messy.
- Safety Glasses and Gloves: While not strictly mandatory for this task, they are highly recommended to protect your eyes and hands from oil or debris.
- Drain Pan (Optional): If you anticipate needing to remove excess fluid or if your jack has been overfilled, a small drain pan can be helpful.
Having these items on hand will save you time and ensure you can complete the job safely.
Step-by-Step Guide: How to Bleed Your Hydraulic Floor Jack
Bleeding the air from your hydraulic floor jack is a relatively simple process that can often be completed in a few minutes. Follow these steps carefully to ensure a proper and effective bleed.
Preparation and Safety First
|
Our Picks for the Best Floor Jack in 2026
As an Amazon Associate I earn from qualifying purchases.
|
||
| Num | Product | Action |
|---|---|---|
| 1 | DNA Motoring TOOLS-00234 Low Profile Hydraulic Trolley Service/Floor Jack, 2 Ton (4000 lbs) Capacity, Lifting Range 5.1"-13", Black |

|
| 2 | Amazon Basics Hydraulic Floor and Portable Car Jack, 2.2 Short Ton/ 2 Metric Ton/ 2 Tonne / 2000 kg Capacity, Slow Release, Red |
|
| 3 | Floor Jack 3 Ton Capacity Fast Lift Service Jack Steel Heavy Duty Hydraulic Car Jack |
|
| 4 | DNA Motoring Low Profile Hydraulic Trolley Service/Floor Jack, 2 Ton (4000 lbs) Capacity, Lifting Range 5.1"-13", Blue, TOOLS-00474 |
|
| 5 | Low Profile Floor Jack 3 Ton (6600 lbs), Heavy Duty Hydraulic Jack for Car, Heavy-Duty Floor Jack with Dual Pistons Quick Lift Pump, Car Floor Jack with Lifting Range 3-1/8'' to 19-7/8'' |
|
| 6 | Dewalt DWHT83550 TOUGHSERIES Construction Jack |
|
| 7 | VEVOR 2.5 Ton Low Profile, Heavy-Duty Steel Racing Floor Jack with Single Piston Lift Pump, Lifting Range 3.35"-14.96" |
|
| 8 | 3 Ton Floor Jack (6600 lbs), Heavy Duty Hydraulic Jack for Car, Heavy-Duty Floor Jack with Single Piston Pump, Quick Lift Car Jack 3 ton with Lifting Range 5.5'' to 18.5'' |
|
| 9 | 3 Ton Low Profile, Aluminum and Steel Racing Floor Jack with Dual Pistons Quick Lift Pump for Sport Utility Vehicle, Lifting Range 3-15/16" min to 18-5/16" max, Net Weight 58.5 lb, Red |
|
| 10 | Floor Jack 2.5 Ton (5500 lbs), Low Profile Floor Jack with Single Piston Pump, Heavy Duty Steel Hydraulic Jack for Car, Jack for Car with Lifting Range 3.4'' to 14.6'' |
|
Safety should always be your top priority when working with hydraulic equipment.
- Clear the Area: Ensure your workspace is clean, well-lit, and free of obstructions.
- Level Surface: Place the floor jack on a flat, level, and stable surface. This prevents the jack from rolling or tilting during the process.
- No Load: Crucially, ensure there is absolutely no weight on the jack. It should be fully lowered and disconnected from any vehicle or equipment.
- Wear Safety Gear: Put on your safety glasses and gloves to protect against oil splashes.
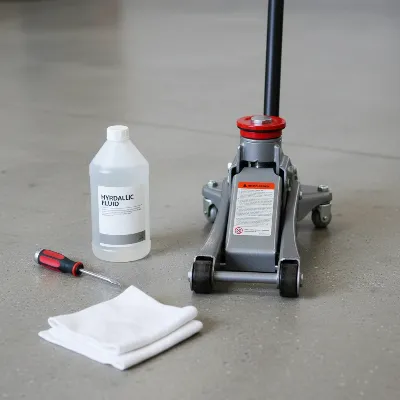 A hydraulic floor jack resting on a clean, level concrete garage floor, ready for maintenance. A small container of hydraulic fluid, a screwdriver, and rags are neatly arranged beside it.
Relieve Pressure and Locate Plugs
This stage releases any residual pressure and prepares the system for air purging.
- Open the Release Valve: Fully open the jack’s release valve by turning it counter-clockwise. This will allow the ram to retract completely to its lowest position.
- Locate the Filler Plug: The filler plug, sometimes called the oil fill plug or reservoir plug, is typically a small rubber or metal cap. It’s usually found on the main body of the jack, often near the oil reservoir or pump housing. You might need to remove a cover plate on some models to access it.
- Loosen the Filler Plug: Using a flat-head screwdriver, carefully loosen the filler plug. You may hear a slight hiss as trapped air is released, which is a good indication that the system is de-pressurizing. Do not remove the plug entirely just yet, but ensure it’s loose enough for air to escape.
Purge Trapped Air
Now, it’s time to actively push out the air bubbles.
- Cycle the Jack: With the release valve still open and the filler plug loosened or slightly removed, rapidly pump the jack handle up and down 5 to 15 full strokes. This action circulates the hydraulic fluid and forces any trapped air bubbles towards the filler hole, where they can escape. You might observe small bubbles emerging from the filler plug opening.
- Specific Models: For some floor jack designs, the process might involve extending the jack to its full height with the release valve closed, then cracking open the release valve to let it slowly lower itself while the filler plug is open. This can be repeated a few times. Always consult your specific jack’s manual if unsure.
Check and Top Off Hydraulic Fluid
After purging the air, it’s critical to verify the fluid level.
- Check Oil Level: With the jack fully lowered and resting on a level surface, check the hydraulic oil level through the filler plug opening. The oil level should typically be just below the edge of the filler hole. Some manufacturers specify the oil level to be even with the top of the piston.
- Add Fluid (If Needed): If the oil level is low, slowly add the appropriate hydraulic jack oil until it reaches the recommended level. Be careful not to overfill, as this can lead to seals blowing out or internal leaks.
- Avoid Overfilling: “The reservoir is considered full when the oil level is just below the edge of the filler hole, and it may start to overflow slightly,” as noted by experts.
Final Steps and Testing
Once the air is purged and the fluid level is correct, you’re ready to seal everything up and test your work.
- Replace Filler Plug: Securely replace the filler plug, ensuring it creates a tight seal. For rubber plugs, you might need to gently massage it into place. For screw-in plugs, tighten it firmly but do not overtighten.
- Close Release Valve: Turn the release valve clockwise until it is fully closed and tightened.
- Test Performance: With no load, pump the jack handle to raise the ram to its full extension, then slowly open the release valve to lower it. The movement should be smooth, consistent, and without any sponginess. If the jack still feels sluggish or exhibits any of the previous symptoms, repeat the bleeding procedure until optimal performance is achieved.
Troubleshooting Common Bleeding Issues
Even after following the steps, you might encounter lingering issues. Here’s how to troubleshoot them:
- Jack Still Spongy or Not Lifting Effectively: The most common reason is that not all the air has been purged. Simply repeat the entire bleeding procedure, ensuring you pump the handle enough times and allow sufficient time for bubbles to escape. Sometimes, multiple cycles are needed for stubborn air pockets.
- Oil Level Drops Quickly After Bleeding: If you topped off the fluid, bled the jack, and then notice the fluid level is low again, it could indicate a hydraulic fluid leak. Inspect the jack thoroughly for any signs of oil seepage around seals, O-rings, or fittings. Worn-out seals are a frequent culprit.
- Jack Fails to Lift at All (After Bleeding): If bleeding doesn’t resolve the issue, and the fluid level is correct, the problem might be more complex. This could point to severely worn internal seals, a faulty pump, or a damaged release valve that isn’t holding pressure. At this point, professional repair or replacement of the jack might be necessary.
- Jack Lowers Slowly Under Load (Despite Bleeding): This often indicates a faulty release valve that isn’t sealing properly, allowing pressure to escape. It could also be a symptom of internal leaks past worn piston seals.
Remember to consult your jack’s owner’s manual for specific troubleshooting tips unique to your model.
Maintaining Your Floor Jack for Longevity
Proper maintenance extends the life of your hydraulic floor jack and ensures its reliability when you need it most.
- Regular Bleeding: Make bleeding your floor jack a routine part of its maintenance, especially if it’s been transported, stored unusually, or if you’ve recently refilled the hydraulic oil. Many experts recommend bleeding new jacks before first use to purge air introduced during shipping.
- Check Fluid Levels: Periodically inspect the hydraulic fluid level. Low fluid levels can introduce air and lead to performance issues. Always top off with the manufacturer-recommended hydraulic jack oil.
- Proper Storage: Store your floor jack in a clean, dry environment, preferably with the ram fully lowered. This protects the seals and prevents moisture from entering the system.
- Use Correct Fluids: Never substitute hydraulic jack oil with brake fluid, motor oil, or other liquids, as these can severely damage the jack’s internal components and seals.
- Inspect for Leaks: Regularly check for any signs of oil leaks around seals, hoses, or fittings. Address leaks promptly to prevent fluid loss and air intrusion.
- Avoid Overload Protection Valves: As a crucial safety note from manufacturers, “When performing maintenance on any of these hydraulic jacks, never touch the overload protection underneath the orange caps. These are set from the factory and will never need adjusting.”
By adhering to these simple maintenance practices, you’ll ensure your floor jack remains a dependable tool for years to come.
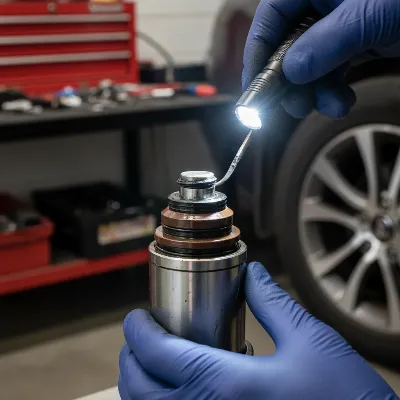 A close-up of a person inspecting the hydraulic cylinder and seals of a floor jack during a maintenance check. The hands are wearing gloves and a flashlight is used to highlight details.
Conclusion
A well-maintained hydraulic floor jack is an invaluable asset in any workshop or home garage. The quick DIY process of bleeding air from your floor jack is a simple yet essential maintenance task that directly impacts its performance, efficiency, and safety. By understanding why air gets trapped, recognizing the tell-tale signs, and following our step-by-step guide, you can confidently restore your jack’s optimal functionality. Regular checks and timely bleeding ensure that your floor jack is always ready to tackle demanding lifting jobs without a hitch. Take the initiative to perform this maintenance, and you’ll prolong the life of your equipment and enjoy reliable service every time.
What DIY maintenance tips have saved your day in the garage?
Frequently Asked Questions
How often should I bleed my hydraulic floor jack?
It’s a good practice to bleed your hydraulic floor jack whenever you notice signs of air in the system, such as spongy lifting, slow operation, or reduced capacity. Many manufacturers also recommend bleeding a new jack before its first use and periodically as part of routine maintenance, especially after transport or if the jack has been stored on its side.
Can I use motor oil in my hydraulic jack?
No, absolutely not. You should only use hydraulic jack oil specifically designed for your equipment. Motor oil, brake fluid, or other fluids are not compatible with the seals and internal components of a hydraulic jack and can cause severe damage, leading to leaks, performance issues, and premature failure.
Where is the bleed valve on a floor jack?
The “bleed valve” often refers to the release valve or the filler plug itself, which doubles as an air bleed point. The release valve is typically operated by turning the jack handle counter-clockwise. The filler plug is usually a small rubber or metal cap located on the main body of the jack, often near the oil reservoir, and is loosened with a flat-head screwdriver to release air.
What if my jack still isn’t working after bleeding?
If your hydraulic floor jack still isn’t working properly after bleeding the air and ensuring the fluid level is correct, the problem might be more serious. This could indicate worn-out internal seals, a faulty pump, or a damaged release valve. In such cases, it might be necessary to seek professional repair or consider replacing the jack.
Why does my floor jack lower slowly even after bleeding?
If your floor jack lowers slowly even after you’ve bled the system, it often points to a problem with the release valve not fully closing or sealing correctly. Internal leaks past the main piston seals can also cause this. Inspect the release valve for any damage or debris, and ensure it’s tightened completely after lowering the jack.
